Being organized and creating a medical binder is one of the best ways to help yourself once you’ve been diagnosed with any health condition. When you hear the words, “You have ___________” your head starts to spin. Depending on the diagnosis, medication and treatment options thrown at you; you become overwhelmed. Everything gets foggy, you have to keep convincing yourself this is your new reality.
After any diagnosis, decisions need to be made. Decisions about doctors, treatments/therapies and surgeries. You may be seeing many different doctors for consultations. Urologists, Gynaecologists, Rheumatologists, Neurologists — there are many different points of view that you may hear. It’s hard to keep everything straight. Not only are you likely to be scared, but you are suddenly thrown into a world with a whole new vocabulary.
⚡️ Que the migraine.
But you can help your care and treatment by being organized. Especially if you are juggling different specialists at different locations. The common factor in all of this is you and your health.
I believe it’s important to go to doctor appointments with a binder of information about your medical history and treatments, as well as notes and questions.
The binder you create will mean that all of your information about your health is in one place. So many of my doctors have asked about my binder and said when I was able to produce test results, dates or other information they needed, “I wish every patient had one of those.”
Now imagine feeling completely ready for every doctor appointment and having little concerns about meeting with your doctor because all of your thoughts have been organized in one space. You can use your binder + planner as a tool to successfully advocate for yourself.
Yes. It’s totally possible!
Step 1: Collect the items you will need for your medical binder
I suggest to have the following:

- The Happy Pelvis’ Medical Binder Kits, download here.
- They are a collection of minimal printer friendly worksheets designed to be a resource for individuals to manage all aspects of their current healthcare, medical history and aids in taking care of the body and mind.
- 1.5-inch binder
- 3-hole punch
- Any ol’ 3-hole punch will do. Find one here
- Divider tabs + Sticky notes
- Colour code your binder using tabs to divide important sections. Click here to find the Avery ones I used.
- I printed the divider pages on card stock (rather than the basic 8.5×11 sheet) and applied the tabs to them. However, you can easily purchase pre-made dividers and use those.
- 8.5×11 letter size paper
- Any basic white paper will do. If you’re running low, you can find paper on Amazon.
- Business card sleeve
- At every doctor’s office, ask for a business card. Keep a card from every doctor you visit even if you decide not to return to them. If you have had any consultation or blood work done there, you should have a card. That way, you will always have contact information when filling out forms at each doctor’s office. You can find these sleeves on Amazon.
- Pen
- ANY pen will do
- Scissors or blade
- To cut out the This Week divider and/or trimming of the cover page.
Step 2: Get rid of unnecessary paperwork before organizing your medical binder
Medical paperwork adds up real fast, so going through what you just don’t need is a good habit to do once a month (I’m guilty of letting it pile up and dread the day when I have to go through it all). Most discharge papers do not hold relevant information. They include current diagnoses you are already aware of and medicine lists. That’s a lot of paper that you don’t need to carry around with you. Also, lab work older than a year, unless it is for genetic testing or something of value, is not something worth keeping in a binder. Blood work constantly changes. Keeping the last 12 months of lab work allows you to remain current while also letting go of previous labs that might be taking up space on your desk or anywhere else in your home.
Step 3: Get familiar with The Happy Pelvis’ medical binder Kits
Download:
The Pelvic Health Wellness Binder Kit, HERE.
OR
The Chronic Illness Wellness Binder Kit, HERE.


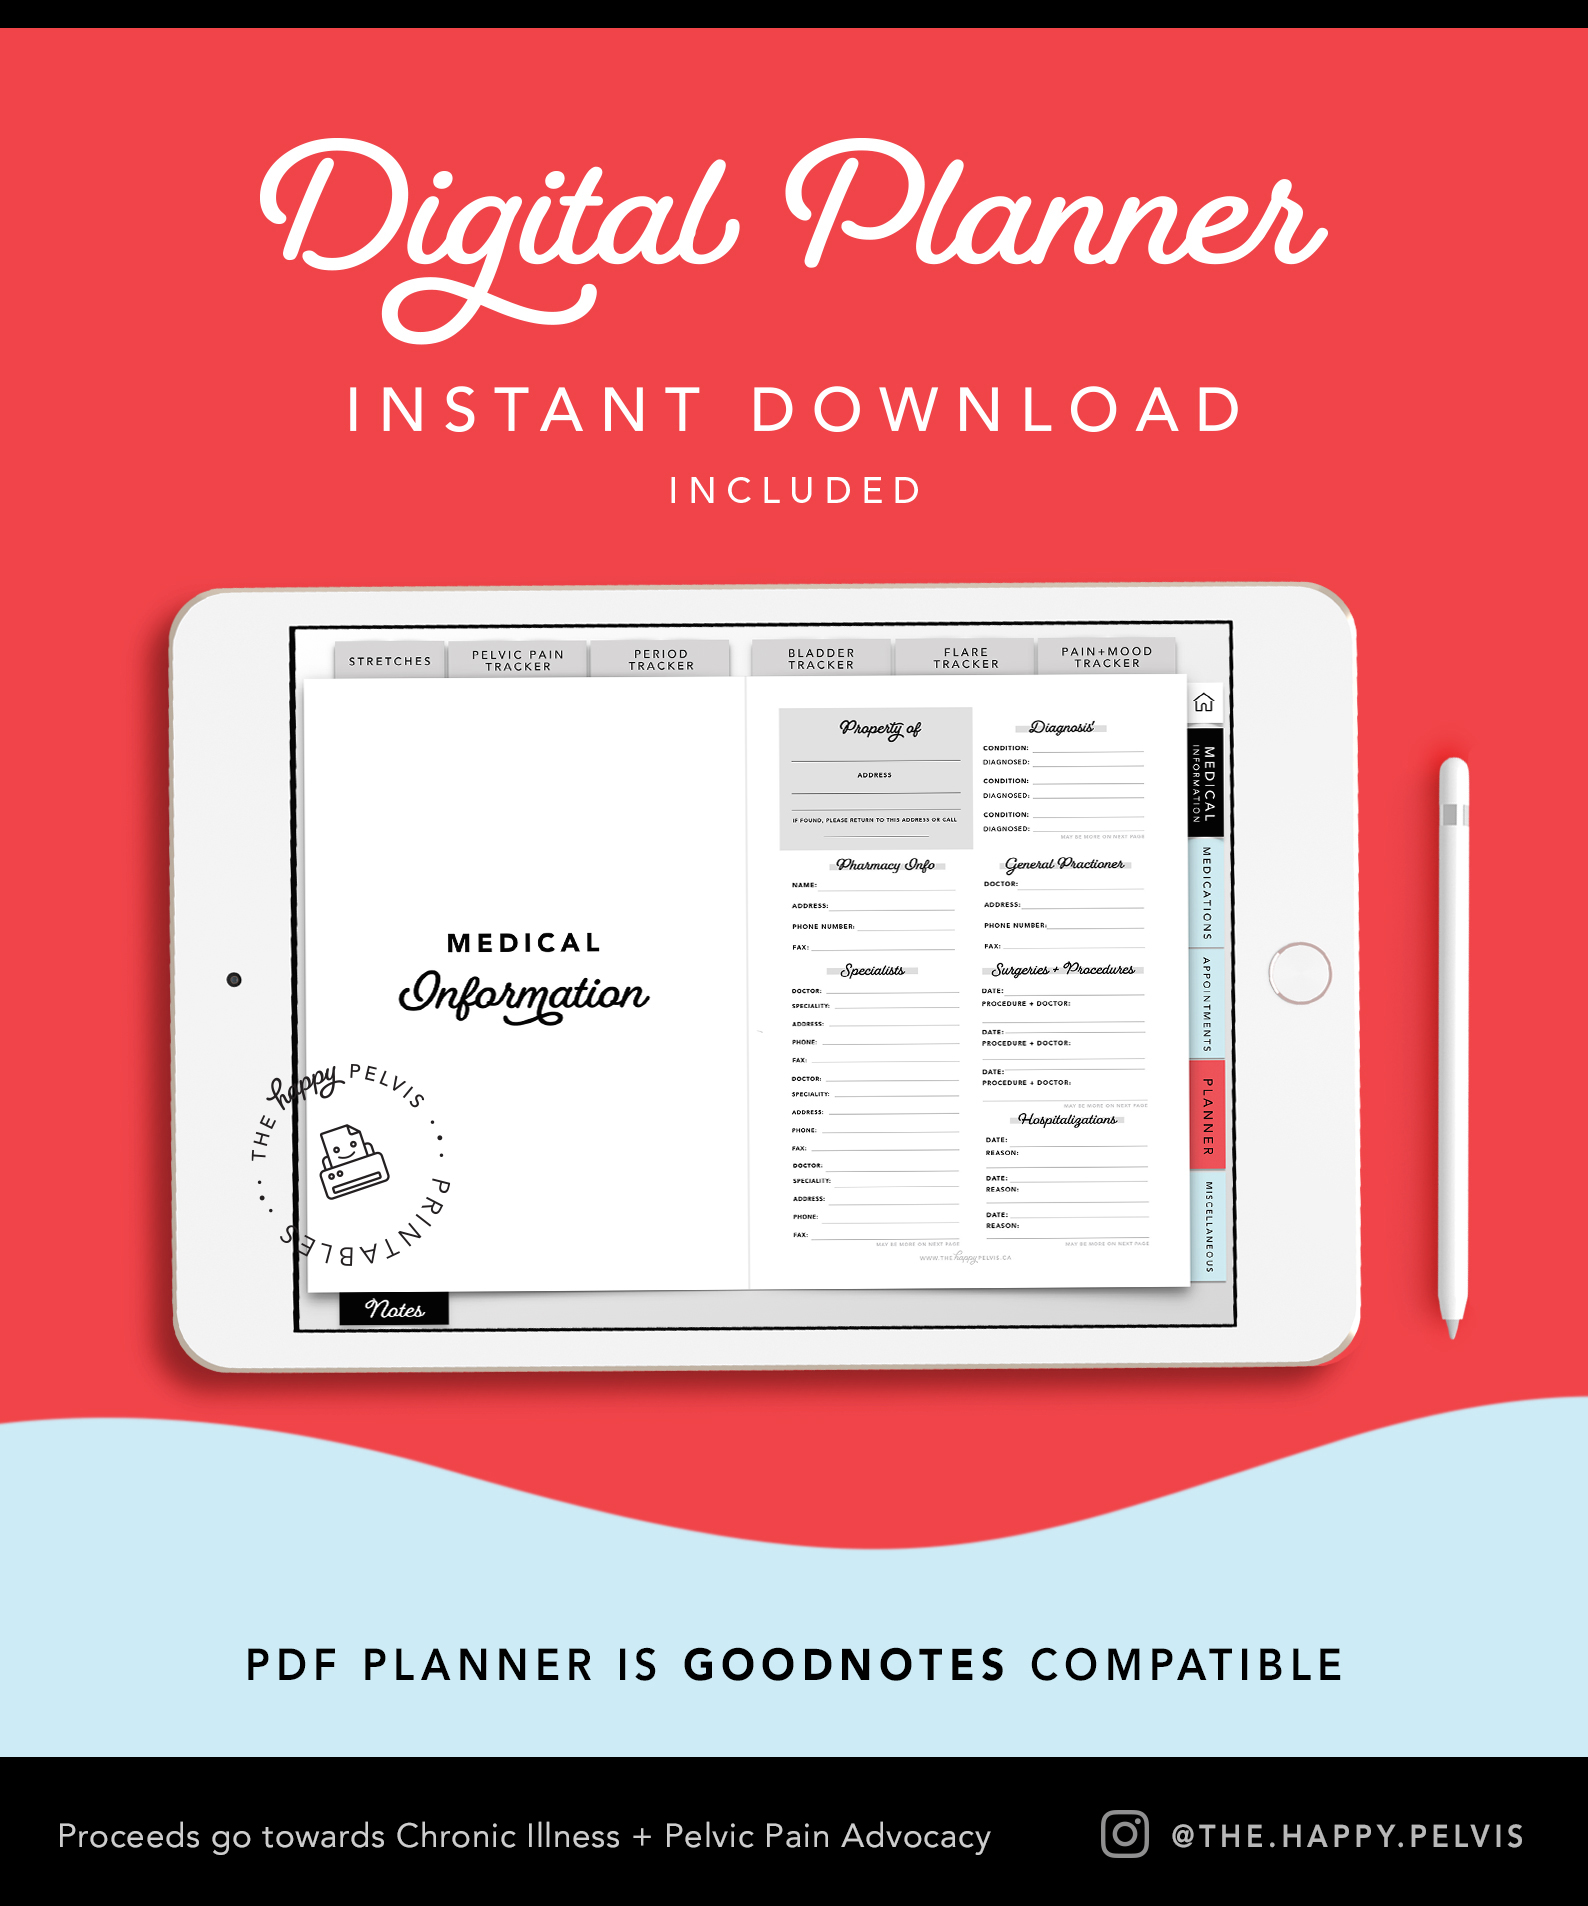


Take a look through the minimal printer friendly worksheets designed to be a resource for individuals to manage all aspects of their current healthcare, medical history and aids in taking care of the body and mind.
Get familiar with the options for your binder. The kit is designed to be customizable for each persons specific needs. Don’t need sleep tracker pages? That’s totally okay, just don’t print those pages! Most printers allow you to select a specific page and also let you decide how often this page is printed.
Every purchase comes with 3 different planner cover design options + 3 bookmark dividers that you can choose from and pages for dividers: all for use in your 3-ring binder.
Step 4: Print!
Pro tip: Instead of printing the entire PDF in one go, it’s better to figure out first how many copies of each page you need and then separately print the different pages.
For best results, follow these tips for printing at home. Please keep in mind that I can only give general recommendations since every printer works a little differently. You may have to do a few test runs before the pages come out perfectly.
Check cartridges
Before jumping into full printing mode, make sure that enough ink is in the cartridges, just incase you run out of ink while printing.
Choose the right paper quality and format
Paper quality: I recommend printing the printables on 20lb copy paper. Dividers can be printed of heavier weight paper, such as card stock instead of regular copy paper. Before buying paper, check what type of paper is recommended for your printer by the manufacturer.
Paper format: All printables in this PDF can be printed on US letter size paper (8.5 in x 11 in). US letter size paper is common in the USA, Canada and Mexico while DIN A4 paper is used in the UK, Australia, New Zealand and most other countries.
Choose the right settings
Most printers can print at different quality levels. For best results, adjust the print settings to print at maximum quality. You can access the settings in the print dialogue box. You can also select the type of paper you want to print on. Also, make sure to choose the correct orientation.
Print at 100%
If a printer thinks a printable is too large to fit on a page, it sometimes will try to shrink it, and the print comes out smaller than it is suppose to. If an image or printable is small, the printer might blow it up, and the result looks blurry and pixilated. You can easily avoid this problem by always choosing the option to print at 100% to keep the true size when selecting the print settings in the print dialogue box. All of the printables come in the correct size, so you don’t have to change anything.
Test print
Before printing the entire PDF, always do a test print of one page first to see if the quality of the print is okay. You may not get the print settings right on the first try, or you find that different settings create better results.
Do the math
Do you only want to print January 2020 to June 2020 of the Planner? Not a problem! Most printers allow you to select a specific page and also let you decide how often this page is printed. Instead of printing all printables in one go, it’s better to figure out first how many copies of each page you need and then separately print the different pages.
Step 5: Layout your binder
After you have printed your planner, place pages in an order that best suits your needs.


Below is a look at how I laid out my own medical binder:
1. Medical information pages tab
2. Medications tab
3. Doctor appointment tab
4. Lab work tab
5. Imaging tab
6. Trackers tab
7. Planner tab
8. Research tab
Some final medical binder tips:
- Depending on your printer or which design you choose, you may have to trim the cover page for the front of your binder so there won’t be white border
- Many specialists are short on time and do not have the time to sit down and read through an entire book of medical history. The more concise and organized your information is, the easier it will be to pass along to a doctor who is watching the clock.
- Lab work can be put in chronological order from the most recent to the earliest but it might not all be necessary. If you think it’s necessary, use small sticky notes to notate within a section. Tabs that can be removed easily allow for changes to be made later.
- Many people find it helpful to have two binders. One for more current information when meeting a new doctor, and one for more sensitive information that still needs to be kept in a safe place such as medical receipts, insurance paperwork and medical bills. The second binder would remain at home for your personal use.